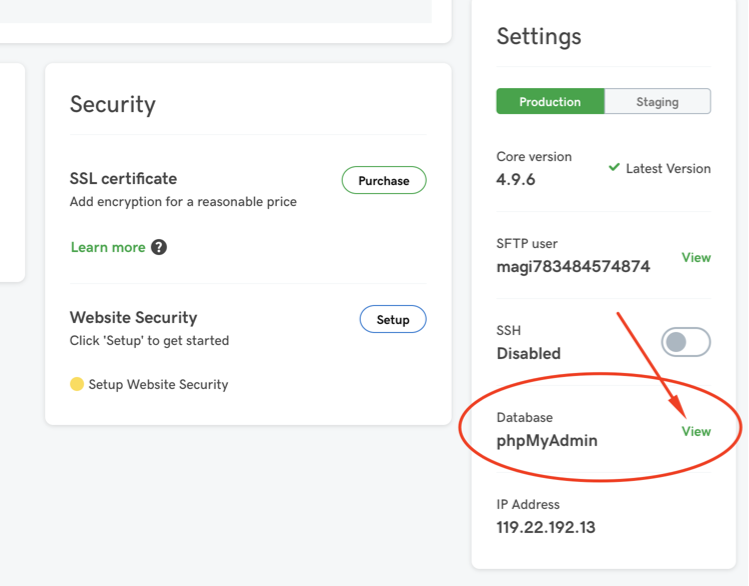
Select to Manage your WordPress Managed Hosting plan.
In the Settings area find the Database section with phpMyAdmin and select View.
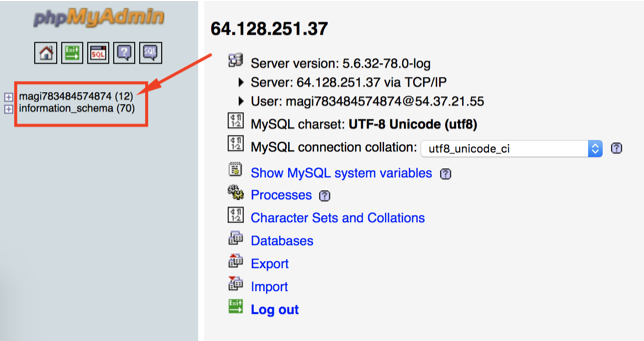
Note the Username and Password in the box that pops up to use as your database connection credentials.
Navigate to the phpMyAdmin URL displayed and use the database credentials to log in.
In the left menu select the database which is usually named the same as your database username (not information_schema).
Note this database name for your database connection settings.
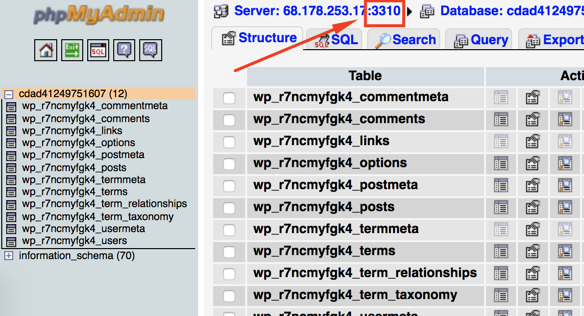
At the top of this new page page from selecting the database name in the left, after "Server:" you will see the database server IP address/host, a colon (:), and then the database server port number, eg: 64.128.251.37:3320
Note this IP address/host and port for your database connection settings.
In the MagicMigration.com Migration Wizard when prompted for database settings and connection information enter the Username, Password, IP Address/Host, and Server Port as determined above.
File Transfer (sFTP) Settings
Login to your Godaddy account.
Go to your Products page.
Select to Manage your WordPress Managed Hosting plan.
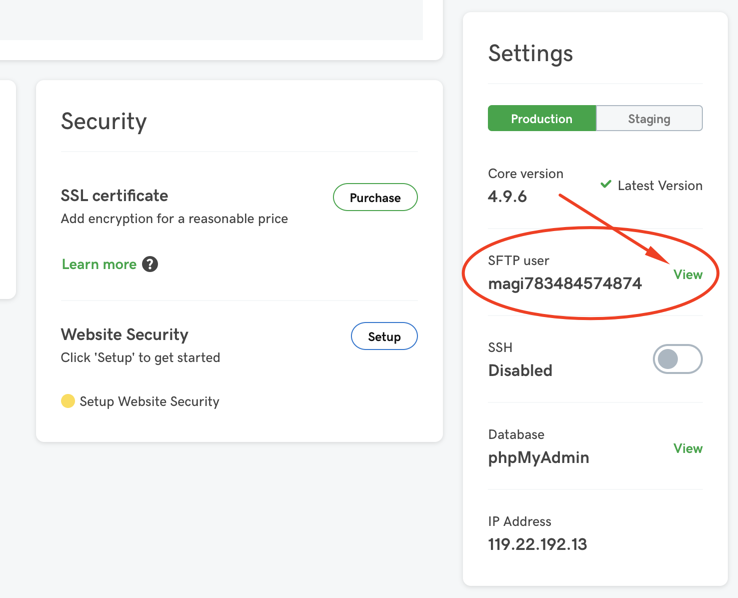
In the Settings area find the SFTP user section and select View.
Note the Host Name, Port, SFTP Username and Password in the box that pops up to use as your SFTP file connection credentials.
To determine the SFTP path replace USERNAME in the following with your SFTP username: /home/USERNAME/html
Example: /home/magi783484574874/html
In the MagicMigration.com Migration Wizard when prompted for file transfer settings and connection information enter these values.